
I was asked to elaborate on a criss-cross crop top I posted on Facebook.

So here's a tutorial on how to make your very own criss-cross crop top!
You'll need:
- Stretchy fabric, about 1-1.5 meters (the pieces we're cutting out are kind of odd-shaped that this is rather fabric-wasting project tbh...)
- Scissors
- Measuring tape
- Pins and some safety pins
- Sewing machine (and an overlocker if you have one, but a sewing machine will work just as well)
- Thread that matches your fabric.
So here's my design on the top:

The measurements in the picture are mine, so you'll have to measure your own:
- A is the circumference of your chest, minus a few centimeters and divided by two. So my chest circumference is around 90cm, and I ended up actually making the length of A a bit more, something like 43cm.
- B is just there to remind me that my arm should fit through the armhole :D
- C is the length of the sides. I wanted to make a crop top so mine is around 20cm, but you can make it longer (or shorter)
- D is the width of shoulder seams (the only actual seams of this top). I'd written down 10cm, and the white top's shoulders are around that width, but the black one I made for this tutorial has narrower "straps".
So like it states on the picture, you cut the fabric so that your C length is on the fold of the fabric. The stretch of the fabric should go sideways from C.
For this tutorial, I made a black top with a purple inside lining (because I didn't have enough black fabric for the lining as well).
Here I have cut the black pieces:

There's two pieces and the side (C) is on fold, so I've actually cut through four layers of fabric in one go. This gives me two black pieces. I guesstimated the shape of the piece, measured the lengths A-D, pinned the four layers and and cut out.
Then I repeated the same on the purple lining fabric (stretchy as well), using the black piece as my guide. That gave me two purple pieces and two black, like this:

I unfolded the pieces and put a black one and a purple one right sides together (if your lining is the same fabric just slap any of your two pieces together right side to right side). Here are the pieces pinned together (upside down):

In case you're wondering at the small cut pieces at the opposite ends, I wanted to make the back of the top a bit different, but you can totally leave the pieces identical.
Then I serged around the edges, leaving the ends open (if you don't have an overlocker, just use a zigzag stitch or a stretch stitch):

Above is one piece serged around the edges, leaving the shoulder parts open so you can then turn the piece inside out (or more like "right sides out", as demonstrated by the lower piece in the picture). Once you've turned the pieces inside out to reveal the right side of the fabric, iron the seams so they settle neatly!

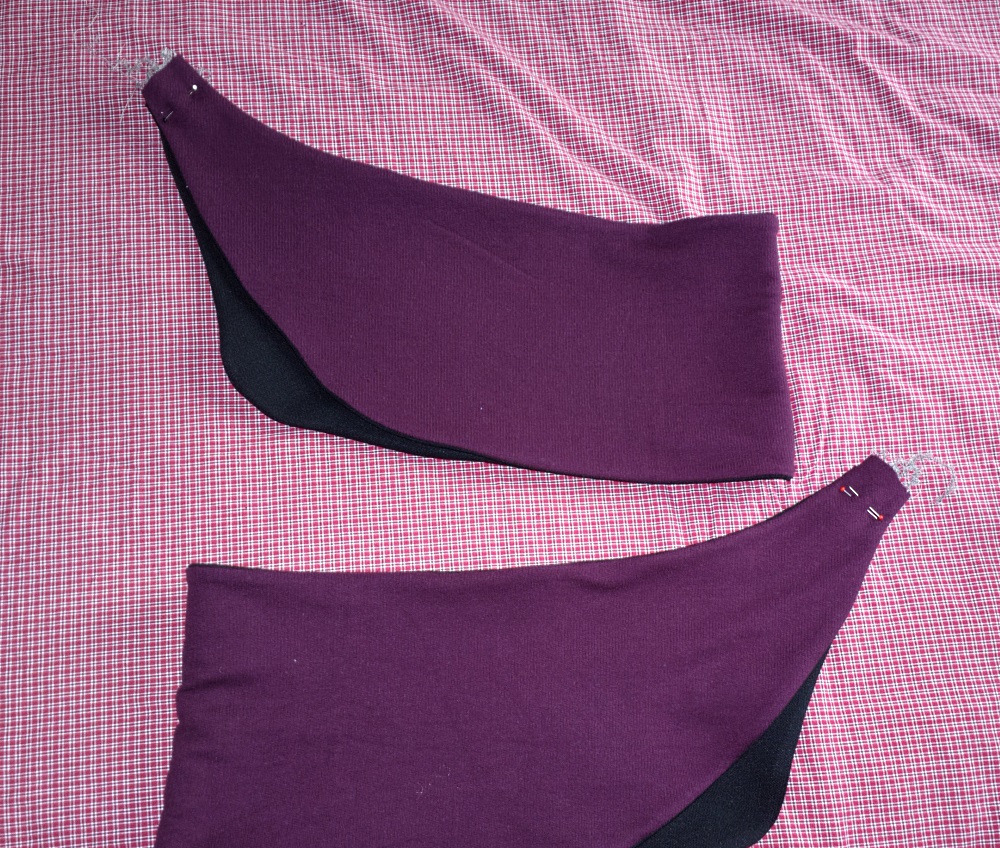
Then they should look like this (folded):

The above picture doesn't really look like a top, but once you put the pieces on top of each other, it starts to look like one:

Next, fold the pieces right sides together to sew the shoulder seams (pinned here):
I sewed the seams with a small straight stitch and then overlocked the excess to get a neat result.


Then it's time to put the pieces on to see the way they should be attached together. This is where safety pins come in handy, as they allow you to pin the top while it's on you without murdering you when you take it off.
Simply put the pieces on separately, the shoulder seam is (logically) at the shoulder and one arm + head go through the piece so that the C length is at the side opposite from the shoulder. Position the pieces so they look nice, then pin with safety pins at the front (don't worry about the back just yet).
Take the top off and thank your safety pins for not trying to kill you like regular pins would have done.
Sew along the red lines, using a straight stitch:

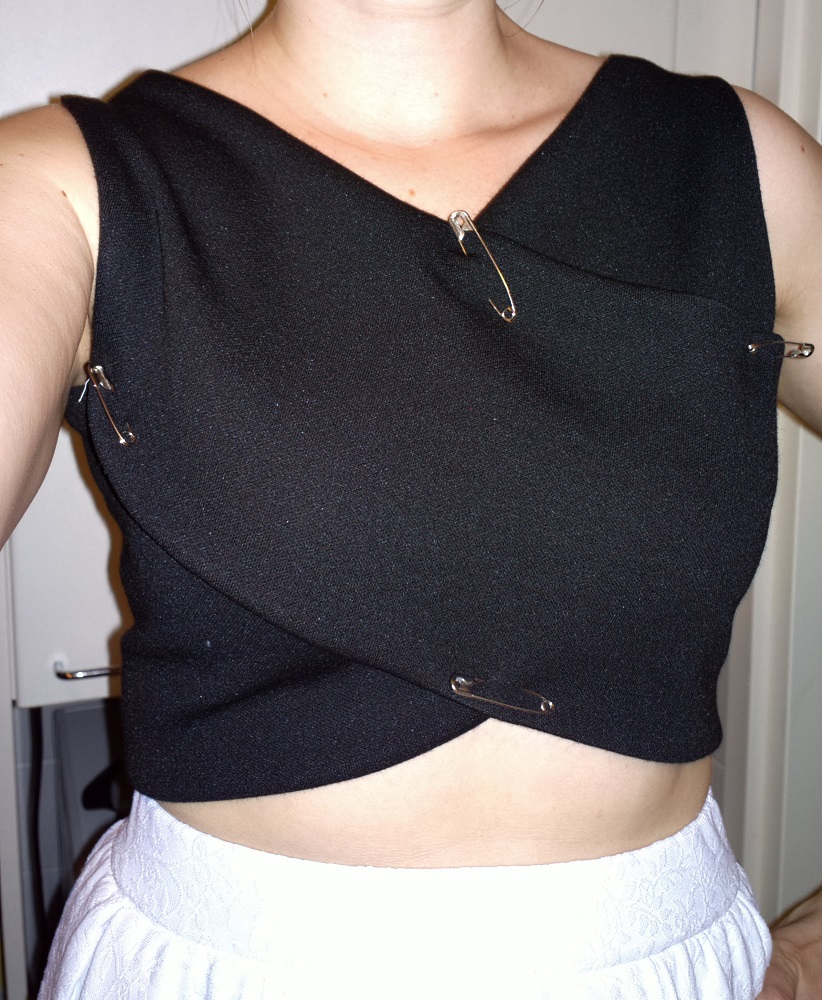
Try to stay close to the edge. The front then looks like this:

Put the top back on and tug the back as you want it. If you have someone who can help you, have them put the four safety pins as you did at the front. If not, then just try and get some safety pins in place so you can determine where to sew. :D Sew the back seams like you did the front:

And that's it, folks! Your criss-cross crop top is done!
Put it on and rock it!


So, I hope you found this tutorial helpful. What do you think of the top? If you decide to try this out please comment with a link, I want to see your criss-cross tops as well! Also, if there was something in this tutorial that was unclear or you didn't understand, don't hesitate to ask, I'll do my best to clear things up! :)
scoundrel
I really really like it but I don't know if I will make it because I'm not sure I would wear it. Once I made a really difficult corset and I never wore it. Fail.
ReplyDeleteAww, you should give it a try! You can make it a bit longer if you're not a fan of cropped tops :)
DeleteThanks for posting! I want to try this with a patterned fabric but am not sure how to solve the thread needed for the straight sew about the criss- cross. Any suggestions?
ReplyDeleteYou mean the color of the thread? I'd just sew it with a thread that's the same color than something on the pattern of the fabric. Like if the fabric had red and yellow on it, I'd either use red or yellow thread. The thread will then be more visible but if it matches the colors of the pattern that shouldn't be a problem.
DeleteAnother thing you can do is hand-sew an invisible stitch along the edge of the criss-cross, that way the top pieces would stay put but there would be no visible stitching along the edges.
Hope this helps! :)
This is exactly what I was looking for!!! Do you have any advice on how to make long sleeves for this armhole?
ReplyDelete