
I spent the weekend by making a floral spring coat.

I found about 3 meters of this light beige floral upholstery fabric in a secondhand store for 18 euros. It felt expensive (because I'm used to paying less than 5 euros for my fabric pieces :D), but it screamed to me that it wanted to become a coat, so I had to buy it.

I had a vision of a collared coat, fitted at the waist but full at the hem. Kind of a like a circle skirt dress but in coat form. Slight bishop sleeves, and some kind of fun pockets of course. (The bishop sleeves were inspired by this month's Make Thrift Buy Challenge on Facebook.)
I made pattern pieces for the bodice.

Then I did something that's very atypical of me: I actually made a mock-up. I'm usually the type to just sew things together on a whim and then fix any faults afterwards, but I wanted to make sure I got the collar and the fit right, so I made a mock-up of the bodice pieces. And it's a good thing I did, because I ended up modifying quite a few of the pieces after trying on the mock-up version.
When I was satisfied with my pattern changes, I pinned the pieces on the actual fabric.
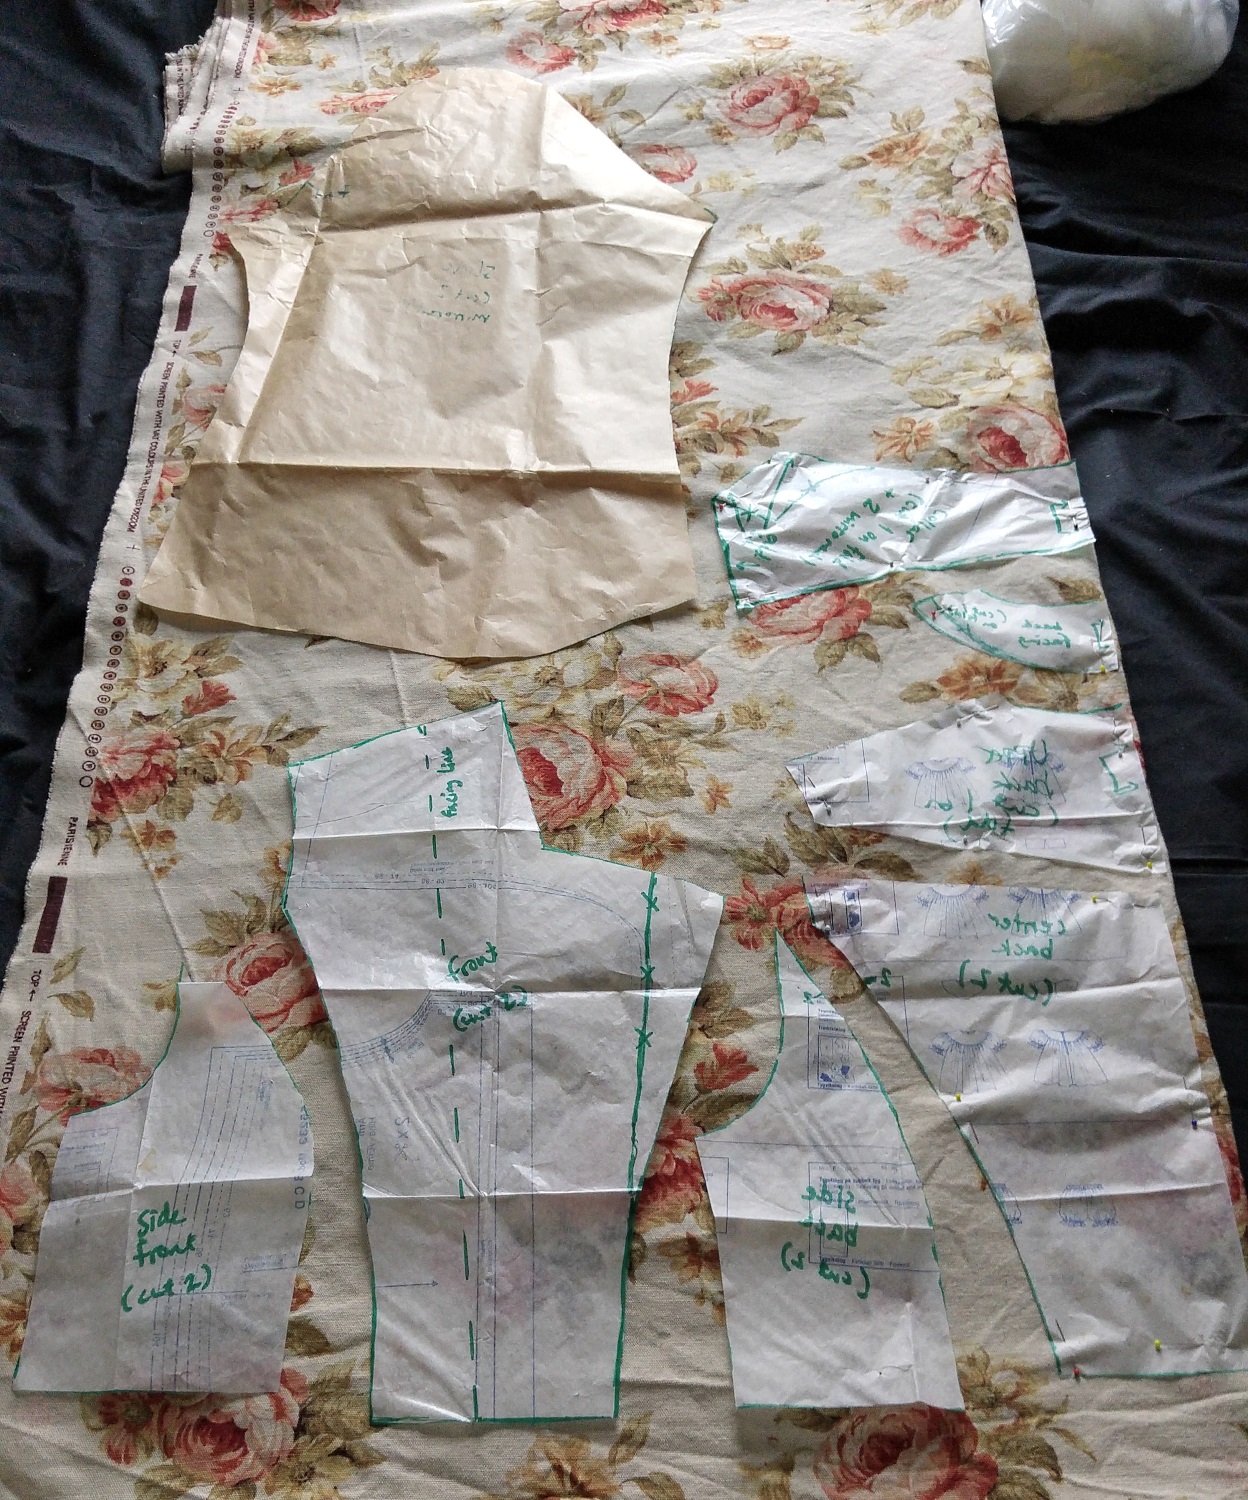
Here are the front and back pieces cut:

And sewn:

I interfaced the bodice pieces with fusible interfacing. I double-cut the front pieces and the top back piece to make facings. I also cut a strip for the waistband and two wide strips for facings that run down the front of the coat.
I sewed the bodice together:

I sewed the sleeves and attached them to the bodice.

At this point, I only had about 1.35 meters of the fabric left, so I had to play a game of Tetris to get the fullest possible skirt for the bottom portion of the coat. In the end I figured out a way to get a 3/4 circle that would be knee-length - perfect!

I had to cut the bottom section in 6 pieces due to amount of fabric I had left, and further slice two pieces in half to get the pockets at the side seams like I wanted.
Here's a diagram of how the bottom of the coat was cut:

Here's how the bottom pieces looked like sewn together:

I made these curved pockets to the side seams:

I attached the waistband on the bodice...

...and the bottom part to the waistband.
I then assembled and attached the collar.

It's starting to look like a coat!

Time to tackle the lining:

The lining fabric is a pair of pale pink slippery curtains I bought secondhand for 4 euros. I cut out the bodice pieces (minus the front pieces and the topmost back piece that I'd already cut out of the floral fabric).
Here are my facing pieces for the front and the back:

I cut the 3/4 circle pieces from the curtain (in 3 pieces because I had enough fabric to do so and no need for pockets on the inside). I cut these pieces a few centimeters shorter than the coat's hem so the lining would not peek from under the hem after bagging the lining.

I assembled the lining pieces and attached them to the facing pieces.

Lastly I sewed the sleeves onto the lining and the lining was ready to be attached to the coat.

I bagged the lining using this ingenious idea I found when I was searching for tutorials to make a lined cape coat. I sewed the lining right sides together onto the coat at the top, sides and hem - the sides being where the front opening attaches to the facing. I ironed the seam open on one side, and as I knew I would be top-stitching down the sides anyway, I then ripped a hole to the seam attaching the front facing to the front. I turned the whole thing inside out using this hole, and then I could simply top-stitch down the front and it would close the gap. Easy as pie and no hand-sewing involved! :) Unfortunately I got so into this that I totally forgot to take pictures, sorry!
(I actually ended up seam-ripping both of the front seams because I chose a zipper as my method of closure instead of buttons, and I wanted the zipper to be sewn in between the front and the facing, but that's another story... and of course I forgot to take pictures of that as well.)
So, after I had attached the zipper and top-stitched down from the collar to the hem, all I needed to do was finish the sleeves.
I made cuffs for the sleeves.

The idea with these is to gather the sleeve to match the cuff, then sew the end that's not turned (right sides together and raw edges matching) onto the gathered sleeve. Then the cuff is turned inside the sleeve so it's folded in half, and the turned edge hides the raw edge of the cuff and the gathered sleeve. The sleeve is pulled inside out through the armhole and the cuff is hand-sewn into the lining, hiding all raw edges.

I gathered the sleeves by hand, then stuffed the cuff over it and sewed around the cuff.
Here's the cuff sewn and folded in half so the other half is on the inside:

And here's how it looks on the inside once the other side is sewn onto the lining:

Once the cuffs were in place, I gave the coat a thorough ironing and steaming, and it was finished!


I also took the coat out for a spin:


So, I'd say this project was a success. The coat fits me very well - the only thing I'd change if I could is I'd make the sleeves just a few centimeters longer. I might let out the cuff and add some length there at some point, but otherwise I am very please with how this coat turned out.
The total costs:
- Upholstery fabric 18 euros (secondhand)
- Pink curtains for lining 4 euros (secondhand)
- Zipper 0,50 euros (secondhand)
- Fusible interfacing, about 4 euros (I estimate I used about a meter and it's 4 euros / meter)
= 26,50 euros. Pretty good deal, I'd say. :)
What do you think of the coat?
Satu / Sew Scoundrel
Ihana takki ja sopii sulle täydellisesti! Oot käsittämättömän lahjakas! :-)
ReplyDeletewww.fashionpoetry.eu
Kiitos! ^_^
DeleteWow! This is absolutely amazing and you've definitely inspired me to make myself a lightweight coat. Hopefully I get as lucky as you with my fabric shopping!
ReplyDeleteThanks, and good luck with your fabric hunting! :)
DeleteAivan mielettömän kaunis takki ja istuu kuin olis mittojen mukaan tehty ;) Päätin jo kerran, etten enää ala tehdä takkia, kun ei niistä kuitenkaan koskaan tuu täydellisiä mut tää on niin upee, että joudun ehkä vähän vielä harkitseen takkiprijektia. Kiitos yksityiskohtaisista kasausohjeista!
ReplyDeleteKiitos! :) Takit on loppujen lopuksi helppoja siitä, että kun olet kerran tehnyt yhden niin seuraava sujuu jo tosi paljon helpommin. Itse tein noin vuosi sitten ekan takin ja nyt kun katson sitä näen siinä miljoona virhettä ja väärin tehtyä asiaa ja istuvuuskin on loppujen lopuksi vähän niin ja näin, mutta tämän takin kanssa koen onnistuneeni hyvin. Katsotaan vaan niin vuoden päästä katson tätä takkia silleen "no tuonkin olisi voinut tehdä paremmin..." :D Niin sitä kehittyy! :)
DeleteOh my God, this so lovely . . .
ReplyDeleteHere we make pattern simply, so simple that after I looked your pattern I thought I need to learn how to make those pattern . . . Please teach me how to make the pattern . . .
Haha I'm not sure if I'm the best teacher for pattern-making because my method often is "try something and if it doesn't work, try something else!" - so I don't really know what I'm doing here, I've just kept trying until I've reached this point. :)
DeleteI'll see if I have time to make a pattern-making tutorial at some point toward the summer, but no promises :D
It's awesome *___*
ReplyDeleteAnd it looks really difficult, I seem to be out of my creative hiatus, but I need more exercise before starting something like this.
Thank you! And it's not really that difficult. Okay, if it's the first coat you make then it is difficult, but it gets easier after that! :D
DeleteOMG, this coat... I am in awe.
ReplyDeleteI keep coming back just to watch. Gorgeous...
I know this is an old thread, but exactly what I want. Looks great! Thank you. Hope you are well.
ReplyDelete